Spring Forward Rolls

February brings us a prediction of springs arrival. That groundhog gets everyone’s hopes up for warm weather, shadow or none. March promises the vernal equinox and great chances of more snow. The clocks “spring forward”, the sunlight feels warmer and stomachs start growling for fresher, lighter flavors. Spring Vegetable Rolls are the cure for those winter blues.
COMBAT CABIN FEVER PICNIC

How lucky am I to be friends with some small business owners who wanted to join forces and create a Combat Cabin Fever picnic? Hosted by Valerie of Harvey’s Greenhouse, coordinated and staged by Rebecca of This New Old House, I needed a picnic menu that would match the warmth of the greenhouse and the welcoming nature of our dining area.
Spring Rolls came to mind: a great way to use fresh vegetables, convenient to transport and eat, and the name couldn’t be more appropriate! The biggest hurdle? I’ve never made them.
Once an idea like this gets stuck in my head, I can’t let it go.
Glad I didn’t!
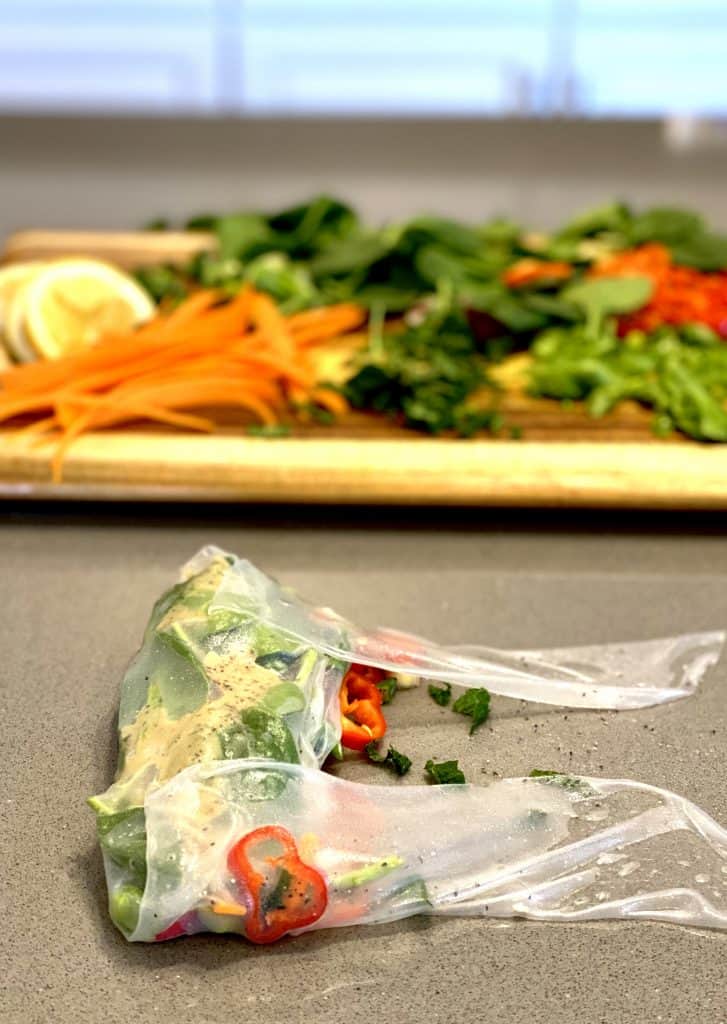
The spring roll wrappers are amazing. Made from rice, they are a firm but fragile, opaque, tortilla-like disc that becomes pliable when immersed in warm water for a matter of seconds. After filling and rolling, they can be rolled up in plastic wrap and stored in the refrigerator for about 24 hours.

There are so many filling options but for this spring-themed picnic, spinach, carrots, peas, radishes and green onions seemed ideal. A squeeze of lemon juice, some fresh mint leaves and a drizzle of Tahini (a condiment of ground sesame seeds), provide the balancing flavors.
For a dipping sauce, a cup of Mexican Green Goddess dressing adds even more flavor from avocado, cilantro, garlic, jalapeño, and Greek yogurt. A simple parfait of vanilla yogurt, berries and granola and a little bag of S’mores snack mix completed our individual picnic boxes.
Whether making one roll or a dozen, these basic steps will guide you through this spring-inspired version. After that, you’ll be well on your way to creating your own flavor profiles for any season or occasion!
SPRING VEGETABLE ROLLS 101
Here’s a step-by-step tutorial on assembling spring rolls.
STEP 1: Prepare The Vegetables

All of the vegetables must be cut or sliced very thin so they can be rolled up in the wrapper without breaking through it. Ribbons of carrots can be made with a vegetable peeler. Cut pea pods and green onions on the diagonal. Peppers and radishes need to be sliced as thin as possible. Spinach is pliable so no chopping is required.
STEP 2: Soak The Wrappers
![]()
Follow the directions on the package of spring roll wrappers. Typically, each wrapper is dipped in a tray of warm (not hot) water for about 10-15 seconds. Remove wrapper from water and carefully lay it on the countertop or a cutting board.
STEP 3: Add The Vegetables

Start laying out the vegetables, each in a single, overlapping layer.
STEP 4: Add Remaining Vegetables and Ingredients

Place a layer of spinach over other vegetables, drizzle lemon juice and Tahini on top and sprinkle with salt and pepper.
STEP 5: Roll

Lift up one edge of the wrapper and fold it over onto the vegetables.
Lift the “outside” edges up and fold them onto the roll.

With fingers, pull and tuck the vegetables together into the wrapper envelope and roll until closed.
If the wrapper tears, add another spring roll wrapper to secure filling.
STEP 6: Serve!

Cover each with plastic wrap. When ready to serve, unwrap and discard plastic wrap, cut spring roll in half and serve with a dipping sauce (e.g. Mexican Green Goddess dressing, Szechsuan/Soy Sauce, Sweet Chili Sauce, Lemon Poppy Seed Dressing).
PIN THIS RECIPE!!

These look great; I will have to give them a try!