Chicken Stock

Yesterday’s post was on roasting chicken and I promised to share some ideas to help you get the most from your leftovers. The first thing was to remove and refrigerate or freeze most of the meat for sandwiches, salads, casseroles or soup. My next recommendation is to make your own stock for your soup or for use in recipes that call for broth/stock.
Notice I used, and many people do, “stock” and “broth” interchangeably. There is a difference (although when I buy it in the grocery store, I don’t notice much difference): “stock” is made by cooking the meat and bones (and sometimes vegetables) in water extracting the fat from the meat and skin as well as the gelatin from the bones. The stock will tighten up when chilled, thanks to the gelatin. When it is warmed up again, it will return to its liquid. Stock also has a more intense flavor to it than broth.
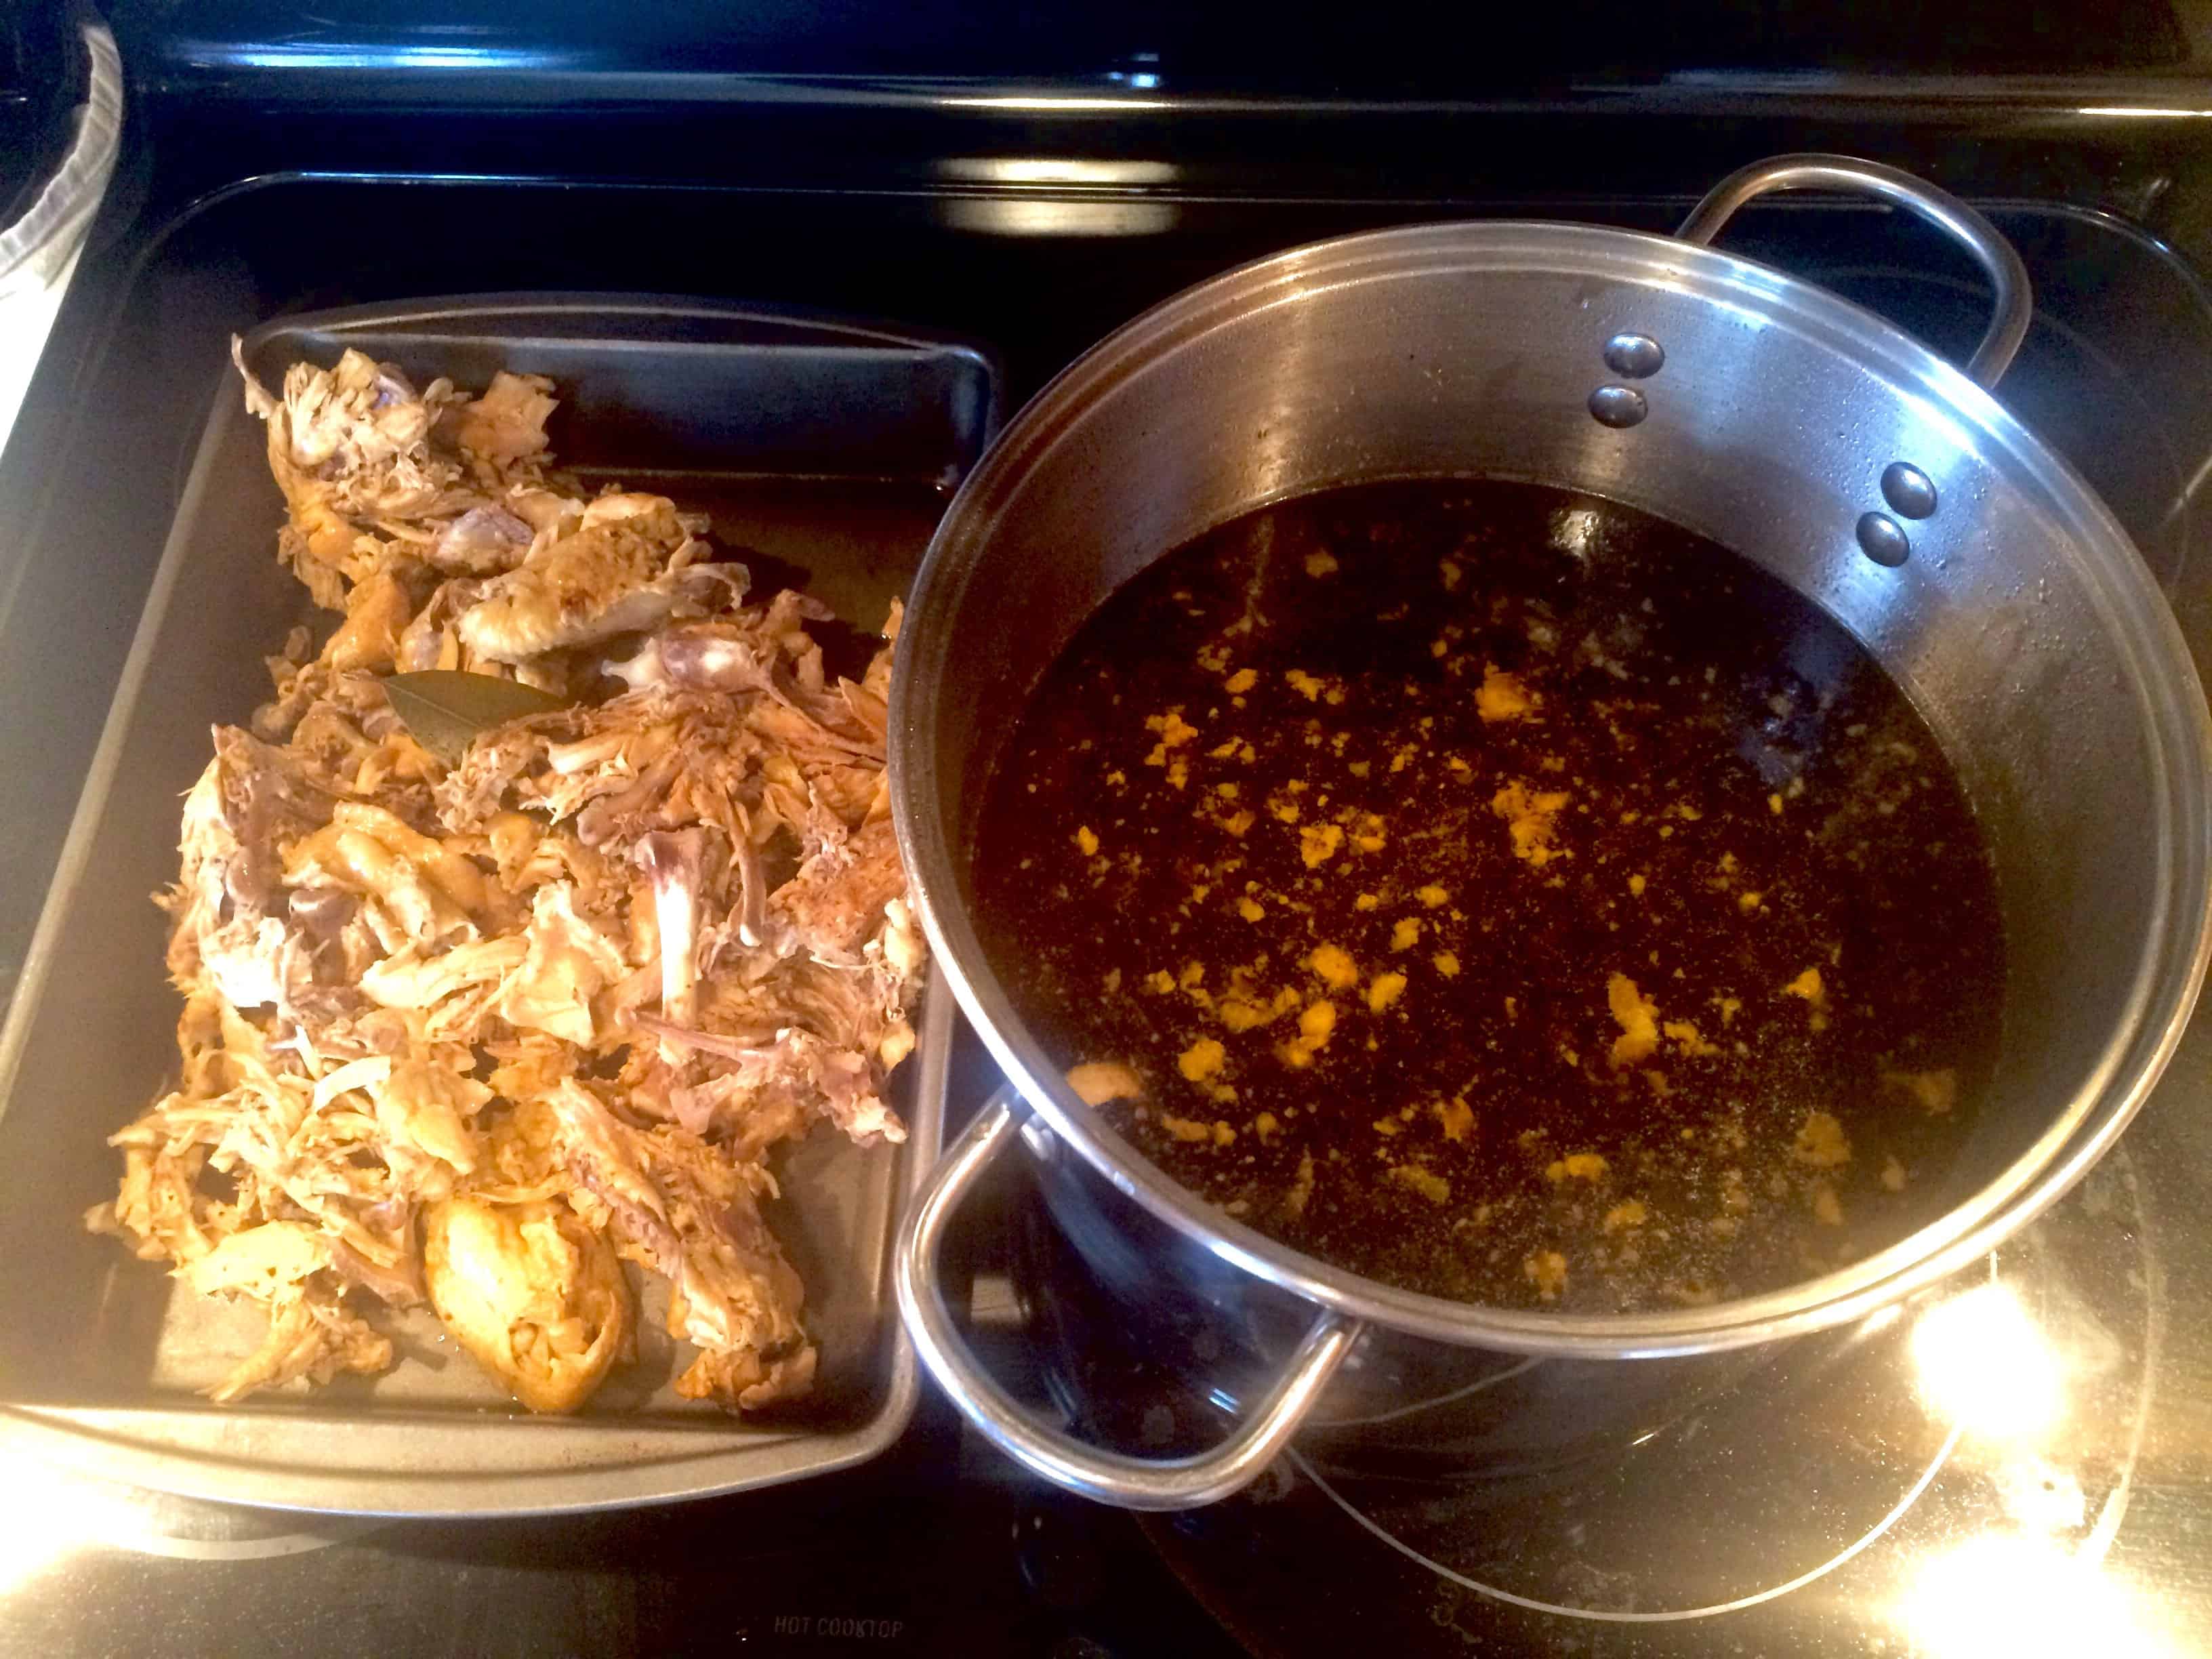
I would also like to point out, as I’m guessing you may have noticed, my stock in the picture above is unusually dark. I have never made stock this dark in my life. It is usually clear and maybe a little yellowish. What happened? When I roasted the chickens, the broth in the bottom of the pan evaporated faster than I expected and the drippings caramelized (that’s the kind way of saying “nearly burned”). I almost threw that part away but luckily I realized how much flavor I would be wasting in the name of color. So those dark drippings went right on in the pot.

Making stock: Yesterday our stock pot looked like this. Take the stock pot out of the refrigerator and pour in enough water to cover the meat and bones (this is an 8-quart stock pot and I put in enough water to fill it to 6-quarts). Add a bay leaf and bring to a boil. Reduce heat and simmer on low for one hour. Remove from heat. Using a set of tongs, remove as many pieces of bone, skin and meat as you can and put them in a large bowl or pan to cool. Allow the stock to cool to lukewarm.
To strain the stock: Line a mesh strainer with several layers of cheesecloth and place over a large bowl. Slowly pour the stock into the strainer being careful not to let the cheesecloth collapse. Remove the strainer and cheesecloth and set the stock aside to cool completely. When the stock is cool, transfer into plastic containers (leave room at the top for expansion), and refrigerate or freeze. Two quart containers work well. Personal preference: the fat will rise to the top of the stock and some, or all, can be removed at any time (as it cools, after refrigeration or after freezing).
Saving the best meat: Within the cheesecloth, collect the pieces of meat. From the bones, skin and meat that was removed earlier, separate out the meat. There is a lot of very tender meat that will be great in soup. Discard the remaining bones, skin and any connective tissue that remains … they have done their job. Refrigerate or freeze the reserved meat for the next recipe of choice.
Is all the time you put into this worth it? Do a taste test. Buy some broth/stock and compare. I use store-bought broth/stock all the time. But I make it whenever I can because:
a) I like knowing exactly what’s in my food
b) I like the process (that’s the mathematical side of me)
c) I was raised with the “waste-not-want-not” mentality of a mother and grandmothers who were “green” long before being “green” was cool. Maybe it’s just a small way to honor them, my teachers.
If you enjoyed this post, be sure to share it on social media using the buttons below. Like what you see? You can become an email or wordpress subscriber at the top left of this page. Please do not hesitate to contact us with thoughts and questions, and if you would like us to try out a recipe or test a product, drop us a line at picniclifefoodie@gmail.com!
5 thoughts on “Chicken Stock”